

VNet-to-VNet VPN connections in Azure allow you to securely connect two or more virtual networks (VNets) across Azure regions. This is useful for scenarios like cross-region failover, data replication, or connecting workloads in different locations.
For example, two sites in East Asia and East US may need to share data, replicate databases, or back up services. A VNet-to-VNet VPN in Azure provides a secure, encrypted link between them, allowing resources to communicate as if they were on the same local network..

In this guide, we will configure a VNet-to-VNet VPN connection between two VNets based on the configuration from our Azure portal:
- VNet1 (East Asia) – Subnet:
172.20.10.4/24 - VNet2 (East US) – Subnet1:
10.10.20.4/24, Subnet2:10.10.2.4/24
Creating the Test Virtual Machines
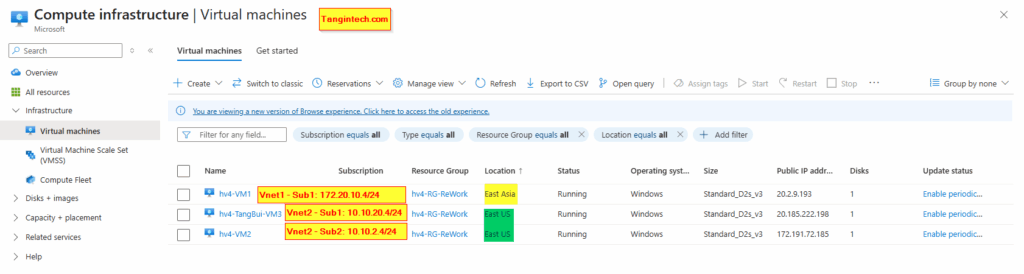
We will deploy three VMs to test the VNet-to-VNet VPN:
- hv4-VM1 – East Asia, VNet1 (
172.20.10.4/24), Public IP:20.2.9.193. - hv4-TangBui-VM3 – East US, VNet2 Sub1 (
10.10.20.4/24), Public IP:20.185.222.198. - hv4-VM2 – East US, VNet2 Sub2 (
10.10.2.4/24), Public IP:172.191.72.185.
When creating each VM:
- Choose the correct Region and Subnet.
- Assign a Public IP for remote access.
- Ensure NSG rules allow RDP (3389) and ICMP (ping) for connectivity testing.
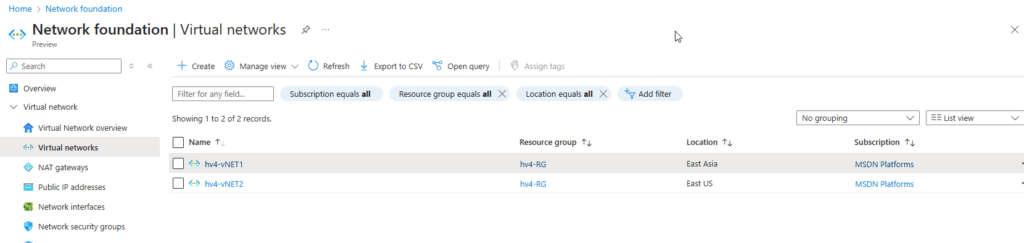
Step 1: Prepare the Virtual Networks
- VNet1 – East Asia
- Name:
hv4-vNET1 - Address space:
172.20.10.0/24 - Subnet:
172.20.10.4/24
- Name:
- VNet2 – East US
- Name:
hv4-vNET2 - Address space:
10.10.20.0/24and10.10.2.0/24 - Subnets:
- Sub1:
10.10.20.4/24 - Sub2:
10.10.2.4/24
- Sub1:
- Name:
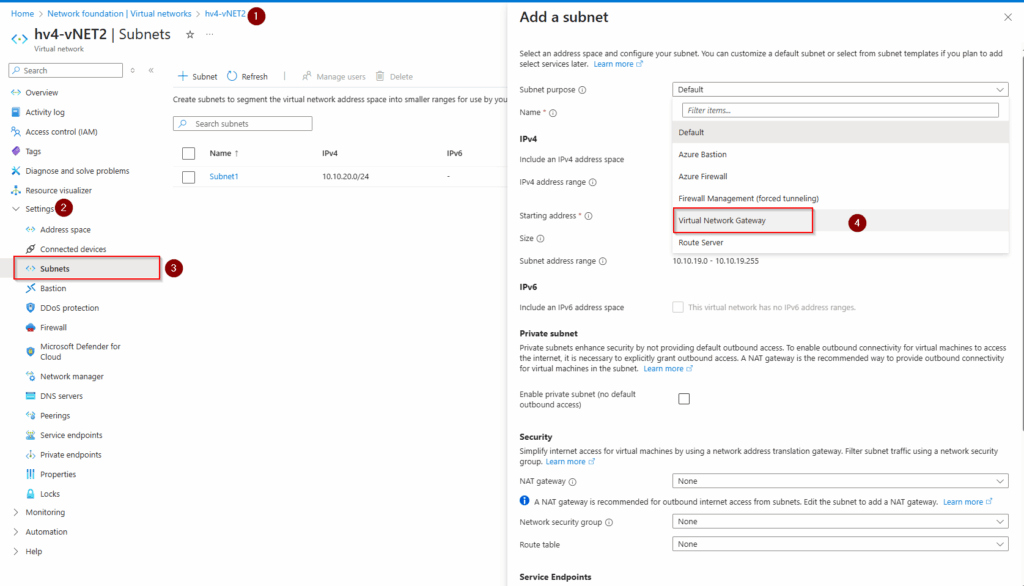
Make sure there is no IP address range overlap between the VNets.
In the Azure portal, go to each VNET . In this guide, go to the vNET→ Settings → Subnet then create+ Subnet → Select “Virtual Network Gateway” from a dropbox.
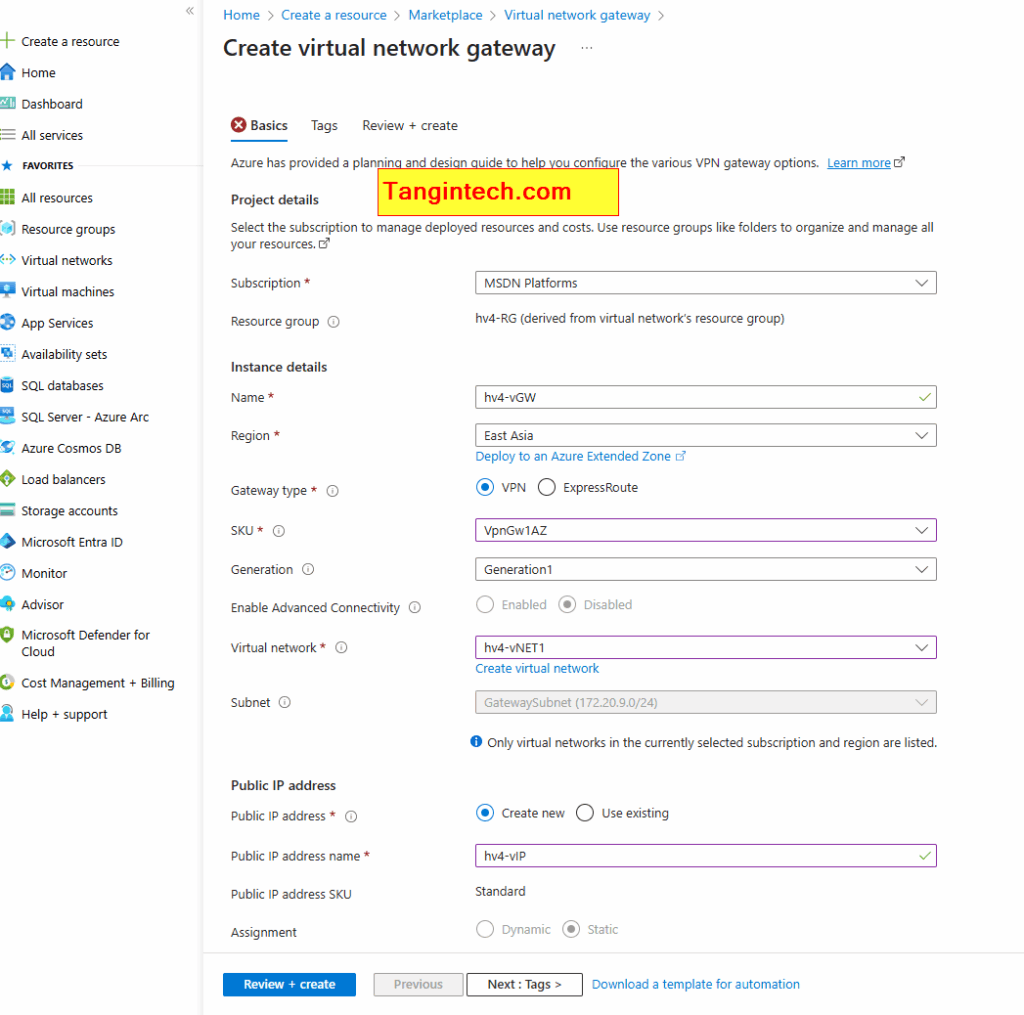
Step 2: Create Virtual Network Gateways
A VPN connection requires a Virtual Network Gateway in each VNet.
For VNet1 (East Asia):
In the Azure portal, go to Virtual Network Gateways → + Create.
Set:
- Name:
VNet1-Gateway - Region: East Asia
- Gateway type: VPN
- VPN type: Route-based
- SKU: Select based on your performance needs (e.g.,
VpnGw1) - Virtual network:
hv4-vNET1
Create a new Public IP address for the gateway.
For VNet2 (East US):
Repeat the steps above, but link it to hv4-vNET2 and name it VNet2-Gateway.
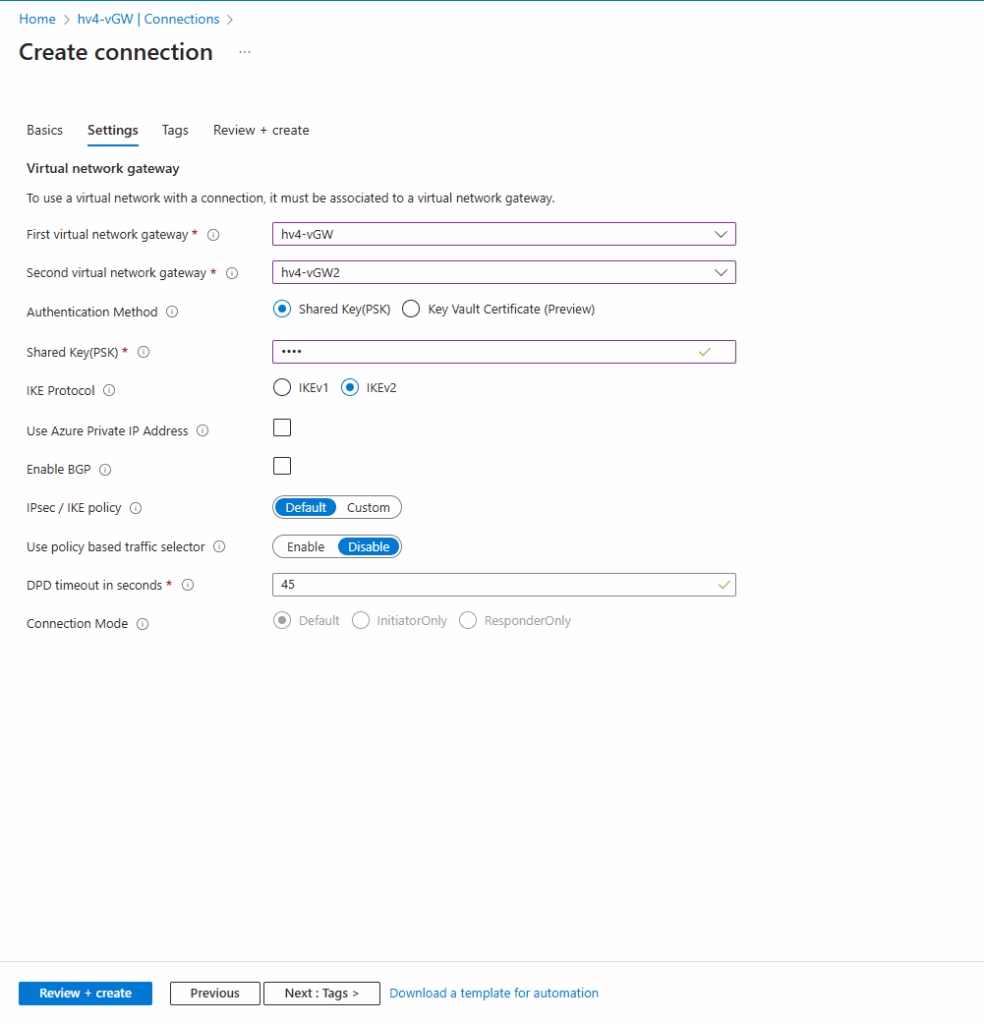
Step 3: Configure VNet-to-VNet Connections
After both gateways are ready:
On VNet1 side:
- Go to Connections → + Add.
- Name the connection
VNet1-to-VNet2. - Connection type: VNet-to-VNet.
- First virtual network gateway:
VNet1-Gateway. - Second virtual network gateway: Select
VNet2-Gateway. - Enter a shared key. Keep it the same for both sides.
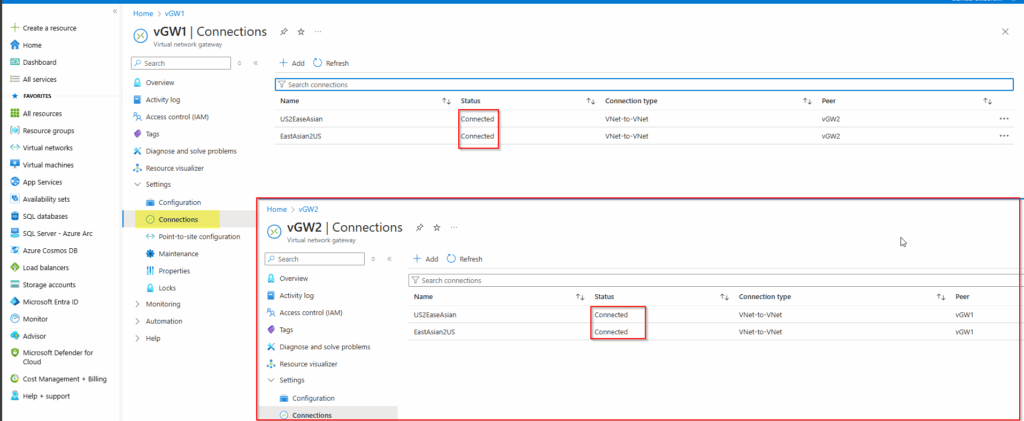
On VNet2 side:
- Add another connection named
VNet2-to-VNet1. - Use the same shared key.
Step 4: Verify the Connection
- You can also test connectivity using ping or RDP from a VM in VNet1 to a VM in VNet2.
Step 5: Test the Configuration with Your VMs
From the screenshot:
- VM in VNet1:
hv4-VM1(IP: 172.20.10.x, East Asia) - VMs in VNet2:
hv4-TangBui-VM3andhv4-VM2(IPs: 10.10.20.x / 10.10.2.x, East US)
You can log in to hv4-VM1 and try:
powershellCopyEditping 10.10.20.4
ping 10.10.2.4
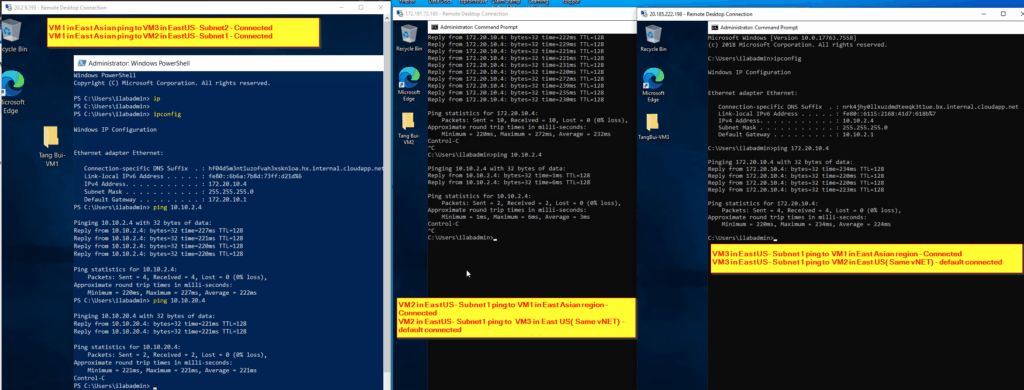
If the pings succeed, your VNet-to-VNet VPN is working and both sites are successfully connected. In upcoming articles, I will provide step-by-step guides on configuring Point-to-Site VPN and Azure VNet Peering to expand your network connectivity options.