

Controlling where users can access your apps and data is crucial for security. With Microsoft Entra ID (formerly Azure AD), you can use Conditional Access Policies to restrict access based on user location.The blog below will guide you through the configuration in my lab.
What is Conditional Access?
Conditional Access is a feature in Microsoft Entra ID that allows you to set policies to enforce specific access controls, like blocking or allowing access from certain locations.
Steps to Create a Location-Based Conditional Access Policy:
- Sign in to Azure Portal:
- Go to portal.azure.com and log in with your Global Administrator account.
- Navigate to Conditional Access:
- In the search bar, type Azure Active Directory.
- Under Protection, select Conditional Access.
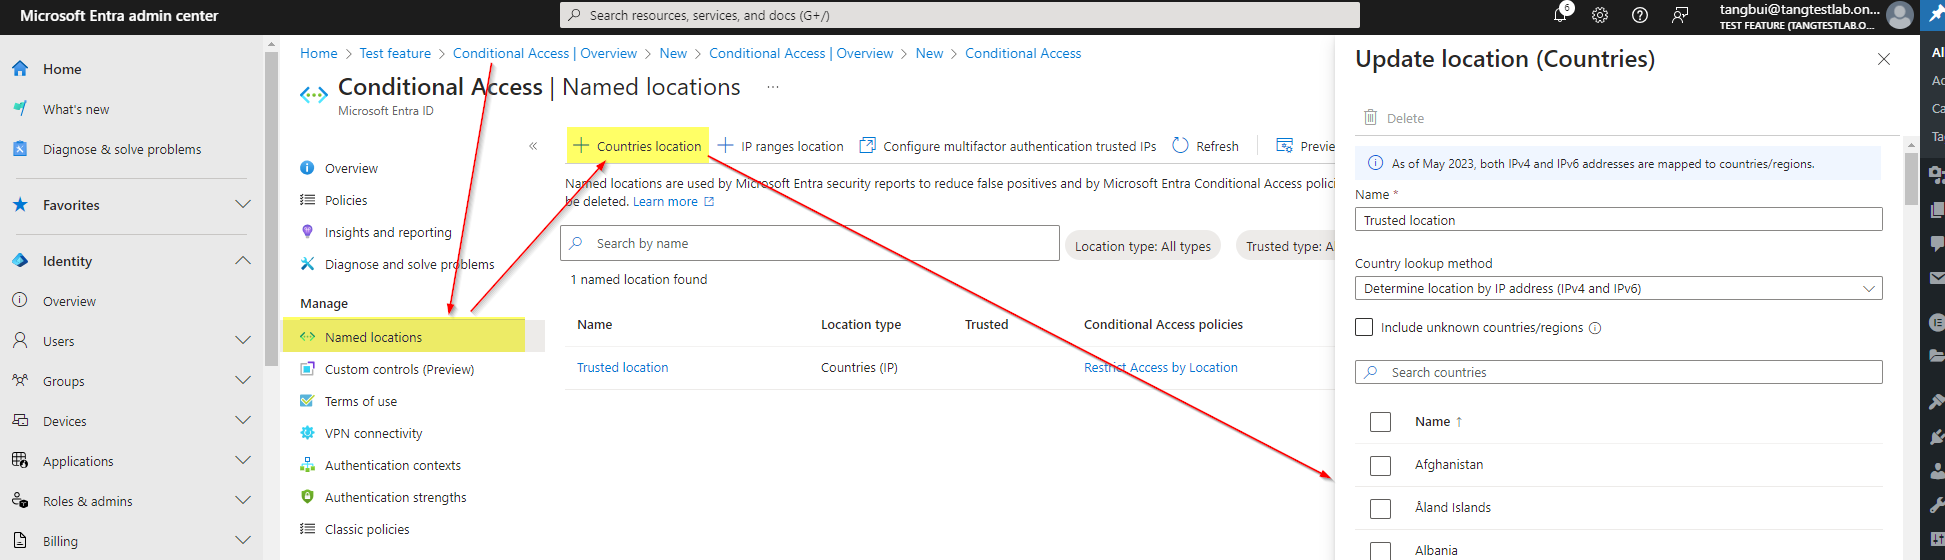
- Named Locations: Define the trusted location or IP Address by select the “Countries location“
- Create a New Policy:
- From the Conditional Access, select “Overview”
- Click New policy.
- Name your policy (e.g., “Restrict Access by Location”).
- From the Conditional Access, select “Overview”
- Set Users and Groups:
- Under Assignments, choose Users and groups.
- Select the users or groups the policy will apply to.
- Set Conditions – Locations:
- Under Conditions, choose Locations.
- Click Yes to configure.
- Add a Trusted Location (e.g., your trusted corporate office’s IP address) as “Include”.
- Add other locations (e.g., foreign countries) under “Exclude” to block access from these areas.
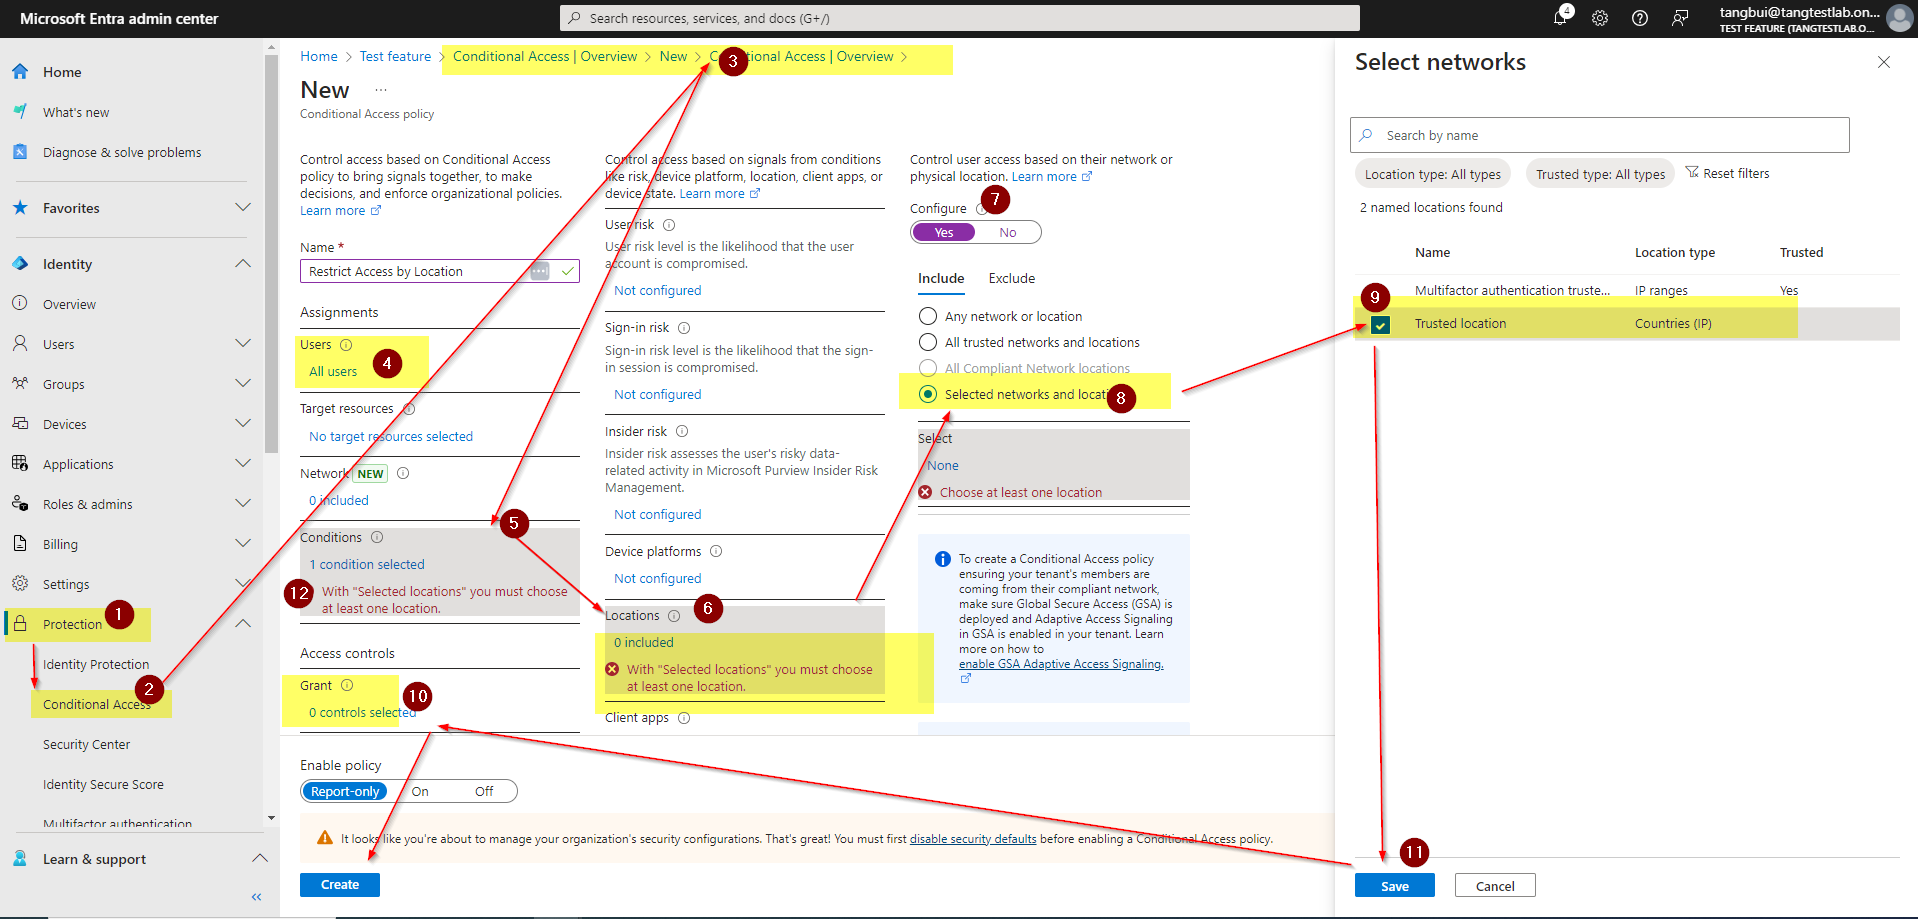
- Configure Access Control:
- Under Access controls, set Grant access and require either MFA or block access if the condition isn’t met.
- Enable the Policy:
- Set Enable policy to On.
- Click Create.
Note: if you are unable to save the rule, you might need to disable the defaul security policy rule.
Why Use Conditional Access by Location?
Restricting access based on user location helps improve security by preventing unauthorized logins from risky or unexpected places. It’s an essential step in securing your apps and data.