

This lab demonstrates how to use the Azure Backup Agent to back up and restore specific files and folders from an Azure VM. The test scenario includes deleting a data folder and some system files, then restoring them successfully.
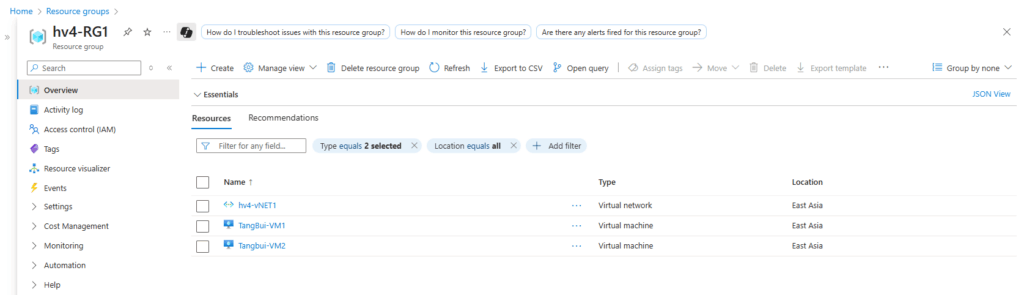
Lab Environment
- VM1:
TangBui-VM1– Azure VM in East Asia region. - VM2:
TangBui-VM2– Azure VM in East Asia region. - Both VMs are connected to the same Virtual Network
hv4-vNET1and managed under the Resource Grouphv4-RG1. - Data Folder:
C:\Data– test files for file-level backup. - Backup Vault:
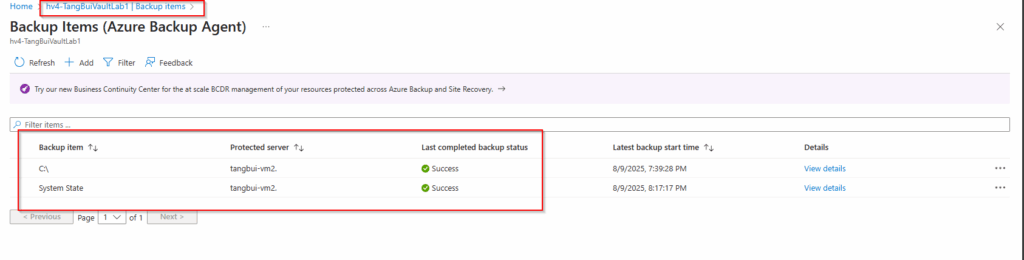
hv4-TangBuiVaultLab1– Azure Recovery Services Vault used for both VM-level and file/folder backups.
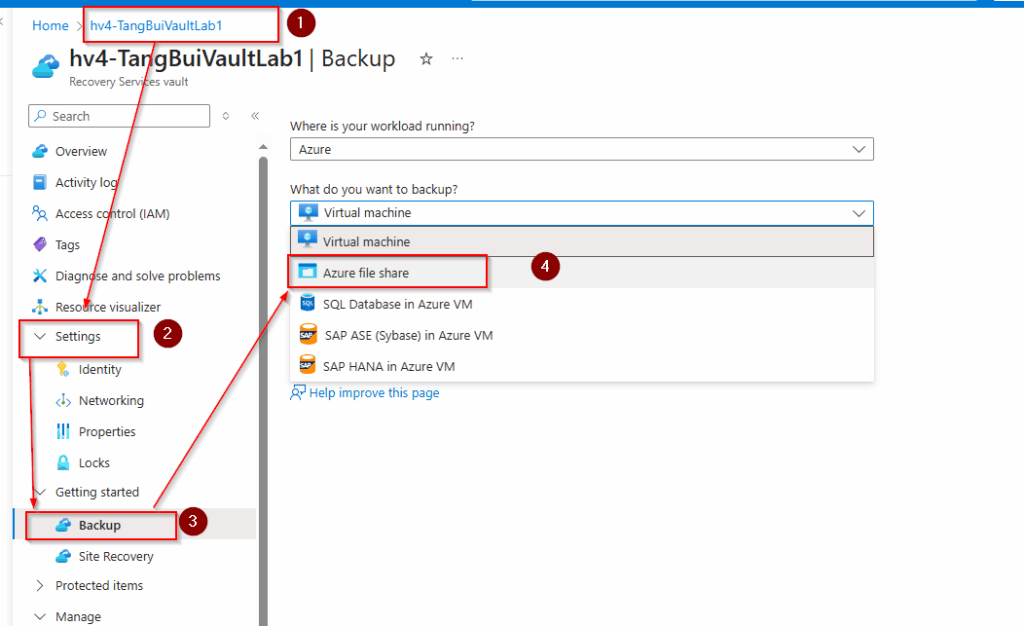
- In the Azure Recovery Services Vault (
hv4-TangBuiVaultLab1), go to Backup → Backup goal:- Where is your workload running? → On-premises (or Azure VM if you want file-level backup).
- What do you want to backup? → Files and folders.
- Click Prepare infrastructure → Download Agent for Windows Server or Windows Client & Download the Vault credentials from the same vault. ( 2 files as total) to the server TangBui-VM2 .
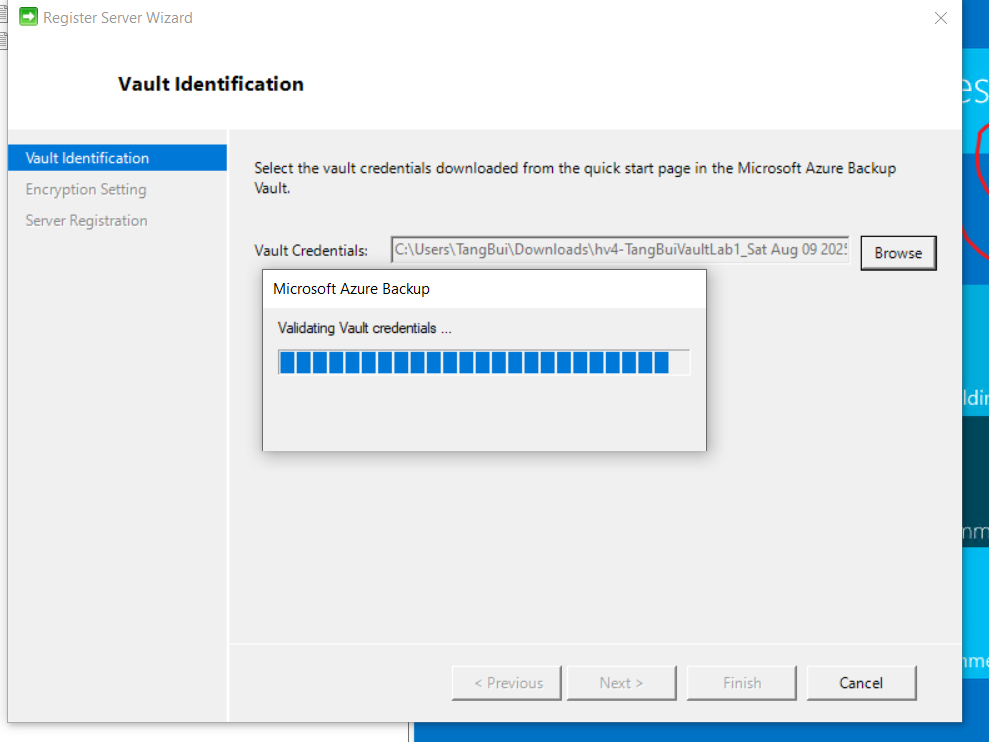
- Install the Microsoft Azure Recovery Services (MARS) agent on the VM (
TangBui-VM2). - From the VM server TangBui-VM2 → Open the Microsoft Azure Recovery Services agent → select Register Server on the right pane → browse to the Vault credentials file to complete the registration.
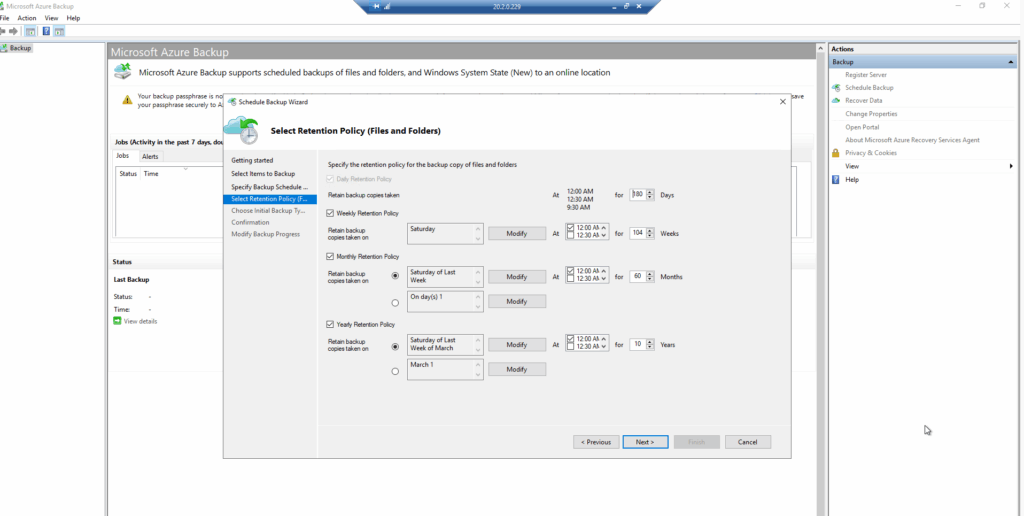
Step 2 – Configure Scheduled Backup
- Open the Microsoft Azure Backup console from the same VM2.
- Select Schedule Backup.
- Under Items to Backup, add the folder
C:\Data. - In Backup Schedule, set the daily or desired backup time.
- In Retention Policy, set how long you want to keep the backup (e.g., 30 days).
- Save the configuration.
Step 3 – Run Initial Backup
- In the Azure Backup console, click Back Up Now.
- Select Files and Folders.
- Confirm and wait until the backup job status is Completed.
Step 4 – Test the Data Loss
- From the VM server TangBui-VM2 , delete the entire
C:\Datafolder.
Step 5 – Restore Files and Folders
- Open the Azure Backup console → choose Recover Data.
- Select This server → Files and Folders.
- Choose the latest restore point.
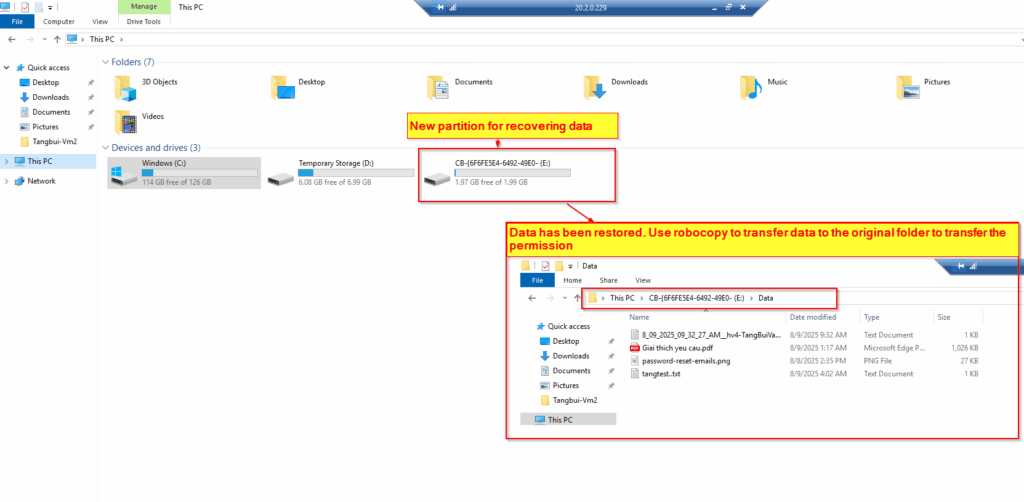
- Select Restore to another location , Azure will mount a Temporary Recovery Volume in this case, it`s E:\ partition.
- Use Robocopy to copy files back to the original location with permissions: powershellCopyEdit
robocopy "E:\RestoredData" "C:\Data" /E /COPYALL /DCOPY:T /R:0 /W:0
Step 6 – Verify Restore
C:\Datais fully restored.- File permissions and timestamps are preserved.
Note:
This method is very useful for protecting critical data on both on-premises servers and cloud VMs.
It allows file-level recovery without needing to restore the entire VM, which can save time and cost in many recovery scenarios.
I will continue part 3 for the System State. Keep watching