
This lab demonstrates how to back up Azure Virtual Machines using Azure Backup, run a backup job, and restore a deleted VM. The process is useful for testing disaster recovery readiness.
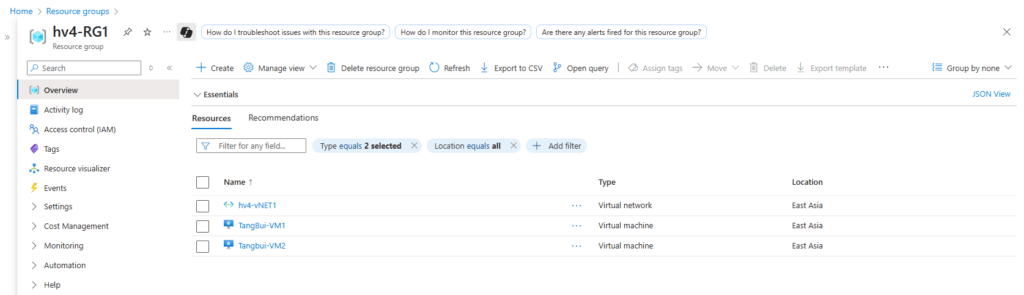
Lab Environment – Virtual Machines
- VM1:
TangBui-VM1– Azure VM in East Asia region. - VM2:
TangBui-VM2– Azure VM in East Asia region. - Both VMs are connected to the same Virtual Network
hv4-vNET1and managed under the Resource Grouphv4-RG1

Step 1 – Configure Azure Backup
- In the Azure portal, Search object “Backup and Site Recovery” → create a Recovery Services Vault . I created the name:
hv4-TangBuiVaultLab1, in the same East Asian region as the VMs.

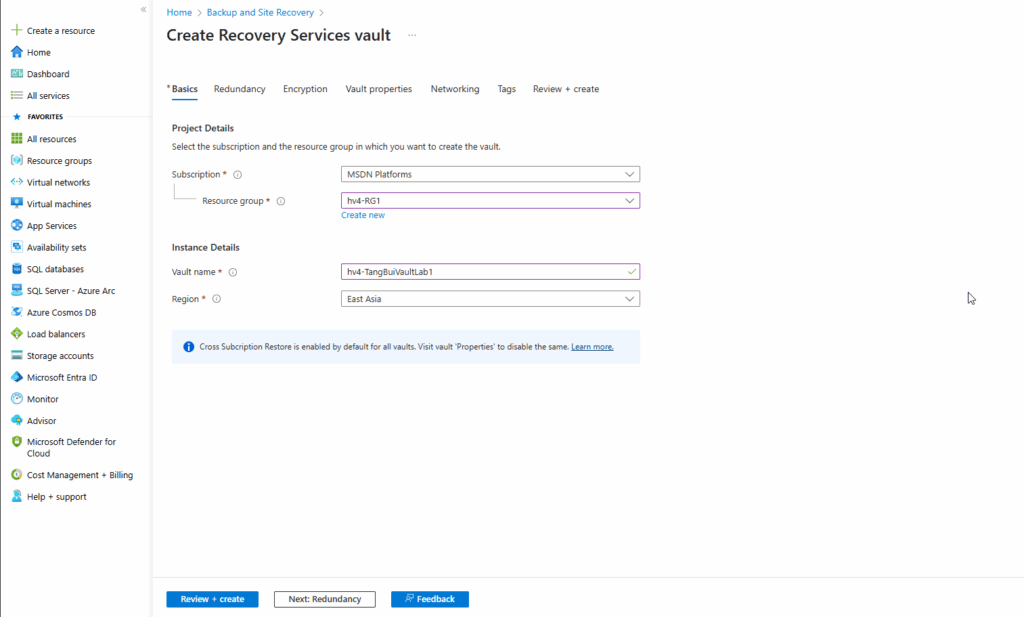
Go to the hv4-TangBuiVaultLab1 and follow steps to configure setting to establish the backup for Azure VMs:

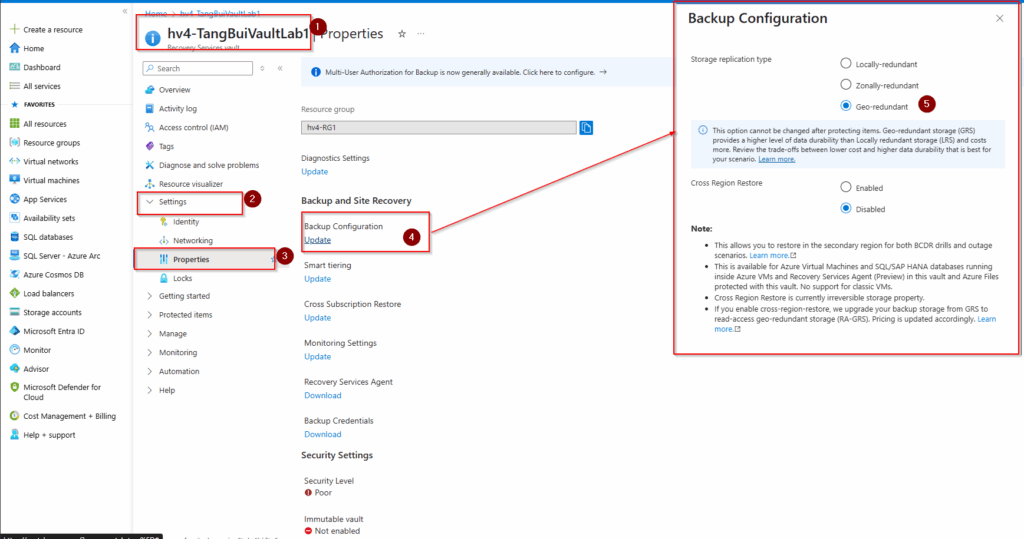

Create the backup policy according to backup strategy and design to follow the VM or system standards


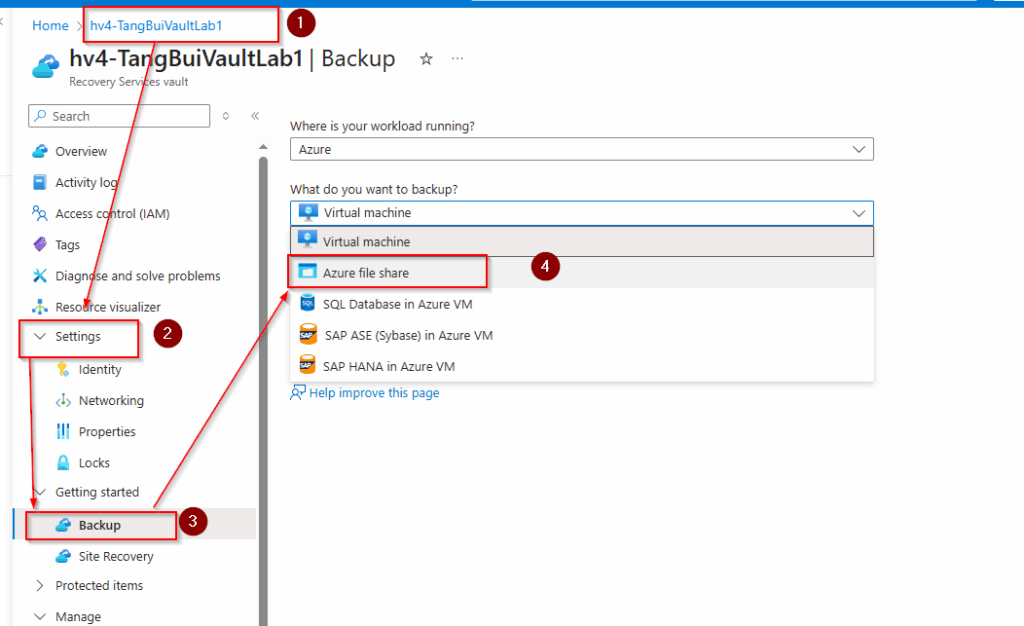
- Open the backup vault
hv4-TangBuiVaultLab1and go to Backup and select settings below to backup Azure VMs :- Where is your workload running? → Azure
- What do you want to backup? → Virtual machine
- Select the subscription and choose the VMs to protect (
TangBui-VM1andTangBui-VM2). - Assign or create a Backup Policy:
- Daily backup at a specific time.
- Retention period as needed.
- Click Enable backup.

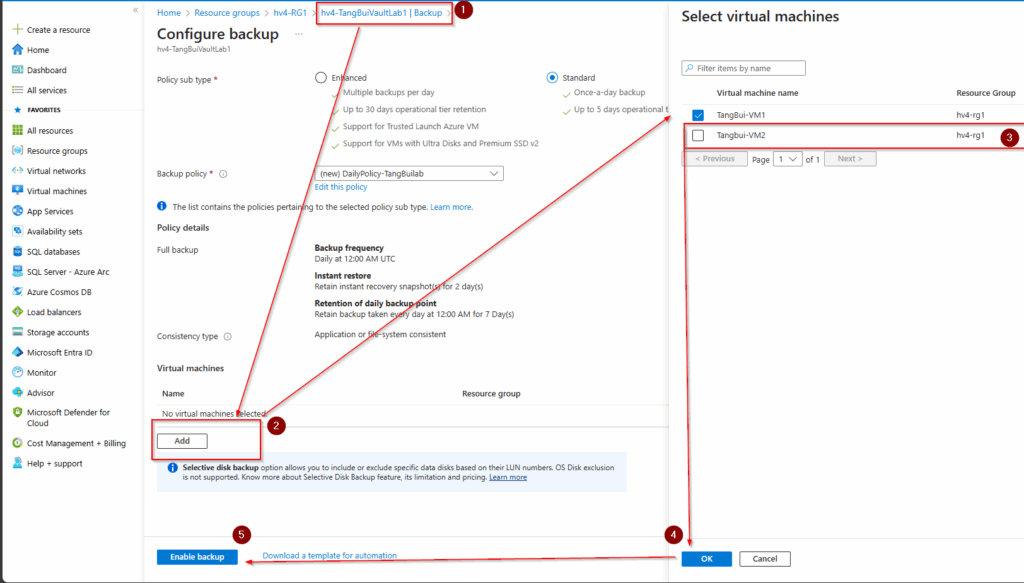
Step 2 – Run Initial Backup
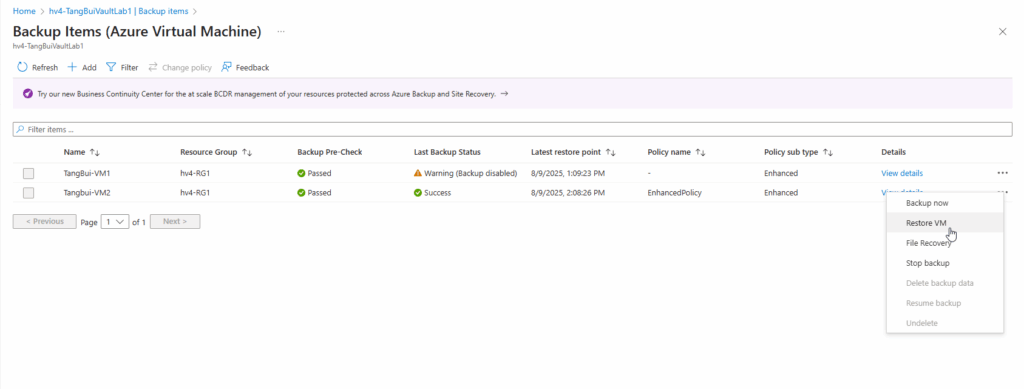
- In the vault, go to Backup Items → Azure Virtual Machine and select the VM need to backup.
- Select each VM → Backup now.
- Monitor the backup job in Backup Jobs until the status shows Completed.


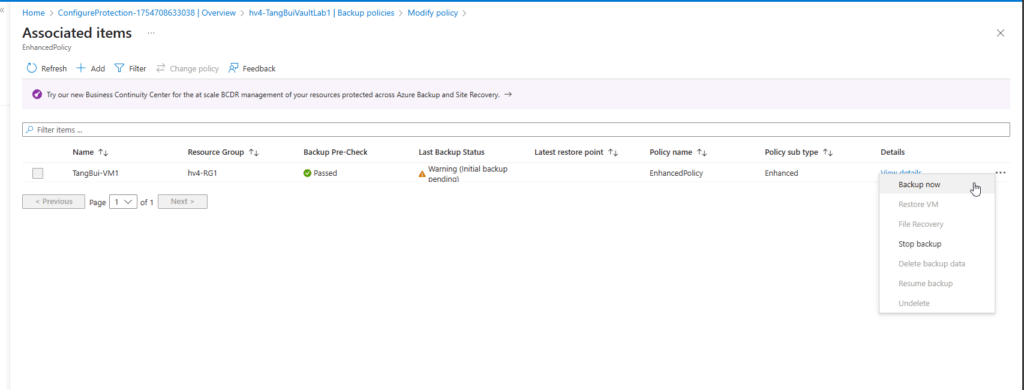
Step 3 – Verify Backup Status
- Go to Backup Items (Azure Virtual Machine) in the vault.
- Confirm that
TangBui-VM2shows Last Backup Status: Success. - Ensure a recent restore point exists.
Step 4 – Remove VM for Testing
- Delete
TangBui-VM2from Azure to simulate an accidental or unplanned VM loss. - This step is for lab purposes only.
Step 5 – Restore the VM
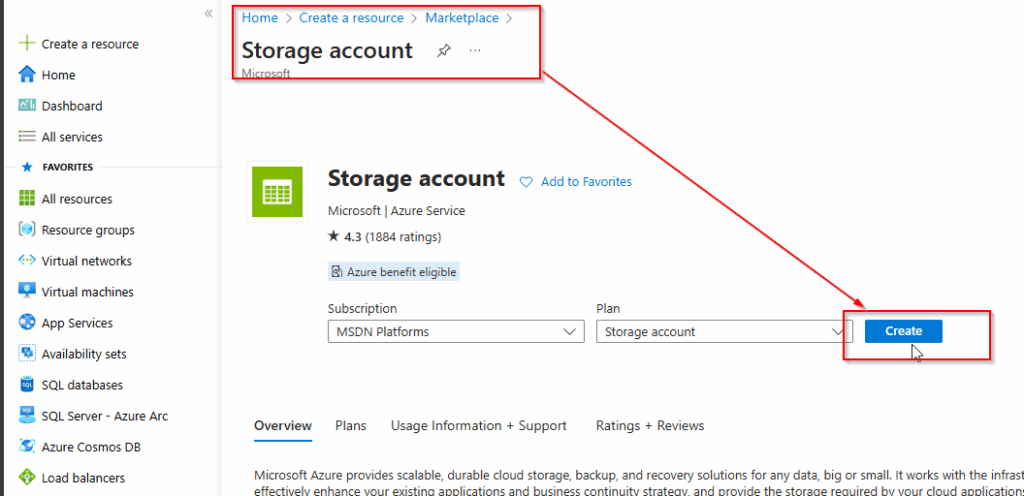
In this step, I created the Storage account “tangbuistorageacc1” to store the backup data

Now we will restore the deleted VM TangBui-VM2 to restore the VM, follow steps below:
- In backup vault
hv4-TangBuiVaultLab1go to Backup Items →Azure Virtual Machine, locateTangBui-VM2. - Click the three dots (…) → Restore VM.
- Configure restore settings:
- Restore Type: Create new.
- VM Name:
TangBui-VM2-Restore. - Resource Group: Original or new.
- Virtual Network: Select network to connect the VM.
- Availability Options: Keep default unless specific settings are required.
- Select the latest restore point.
- Click Restore.


Step 6 – Confirm Restore
- Monitor the restore job in Backup Jobs.
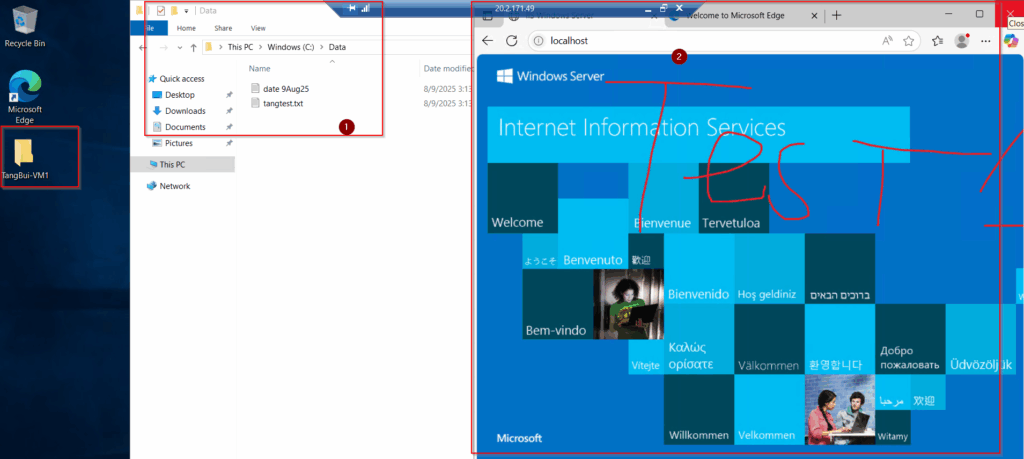
- When complete, check Virtual Machines to confirm the restored VM appears.
- Connect to the restored VM and verify that applications and data match the backup.
From the Azure Portal Virtual Machine, the VM2 is restored . Confirm the access to the server with the same state and configuration

I will continue part 2 of the lab to backup : Files and Folder, System state. Keep watching


